If you’re a car enthusiast or DIY mechanic, you might eventually face the challenge of removing a stubborn axle. Whether you’re working on your vehicle’s rear axle or replacing a damaged part, having the right tools and knowledge is essential. In this guide, we’ll walk you through the process of using an axle puller and other essential tools like a bearing press kit. By the end of this article, you’ll know exactly how to tackle the task and get the job done like a pro.
Why Would You Need to Remove an Axle?
Removing an axle might seem intimidating, but it’s a necessary skill for any mechanic. There are several reasons you might need to remove an axle:
- Replacing a damaged or worn-out axle: Over time, axles can wear down, leading to vibrations or even failure. If your axle is bent or broken, you’ll need to replace it.
- Replacing bearings: When your wheel bearings go bad, it often requires axle removal to replace them.
- Suspension and drivetrain work: Axle removal is sometimes part of a larger suspension or drivetrain repair project.
Whether it’s routine maintenance or a specific repair, understanding how to remove an axle will save you time and money.
Tools You’ll Need
Before diving into the process, let’s go over the tools you’ll need:
- Axle Puller: This is the main tool for the job. It uses mechanical force to pull the axle out of place.
- Bearing Press Kit: A bearing press kit helps with the removal of bearings from the axle and can also be useful during reassembly.
- Socket Set and Wrenches: You’ll need a variety of sockets and wrenches to remove bolts and nuts.
- Penetrating Oil: This will help loosen stuck bolts and rusted components.
- Hammer and Punch: Sometimes a little force is necessary to help loosen the axle.
- Jack and Jack Stands: Make sure the vehicle is properly lifted and supported before you start working.
- Wheel Chocks: For safety, use wheel chocks to prevent the vehicle from rolling.
Step 1: Lift the Vehicle and Secure It
Before you begin, ensure the car is parked on a flat surface. You’ll need to lift the vehicle using a jack. Place the jack under the vehicle’s recommended lifting points, then raise it and secure it with jack stands. Never rely solely on the jack for support.
After lifting, place wheel chocks behind the wheels to prevent the vehicle from moving while you work.
Step 2: Remove the Wheel and Brake Components
To access the axle, you’ll first need to remove the wheel. Use a lug wrench to loosen the lug nuts, then remove the wheel from the hub. Once the wheel is off, you may need to remove any brake components, such as the brake caliper, rotor, and pads, depending on the setup of your vehicle.
Take care not to damage any of these parts, especially the brake lines. It’s a good idea to hang the caliper using a wire to avoid putting stress on the brake hose.
Step 3: Identify the Axle and Its Attachments
Now that you have clear access to the axle, it’s time to inspect the components. Axles are typically connected to the differential on one end and the wheel hub on the other. There may be additional components like the wheel bearings, bearing races, or nuts securing the axle in place.
Check for any rust or corrosion on the axle and its connections. If you’re dealing with a stuck axle, penetrating oil can be a game-changer. Apply some oil to the connections and let it sit for a few minutes to loosen any rusted parts.
Step 4: Disconnect the Axle from the Differential
If your axle is connected to a differential, you’ll need to remove the bolts that hold it in place. Use your socket set to carefully remove these bolts. In some cases, the axle may be connected using a CV joint (constant velocity joint). If this is the case, you may need to remove the CV joint before continuing.
Once the axle is free from the differential, you can move on to the next step.
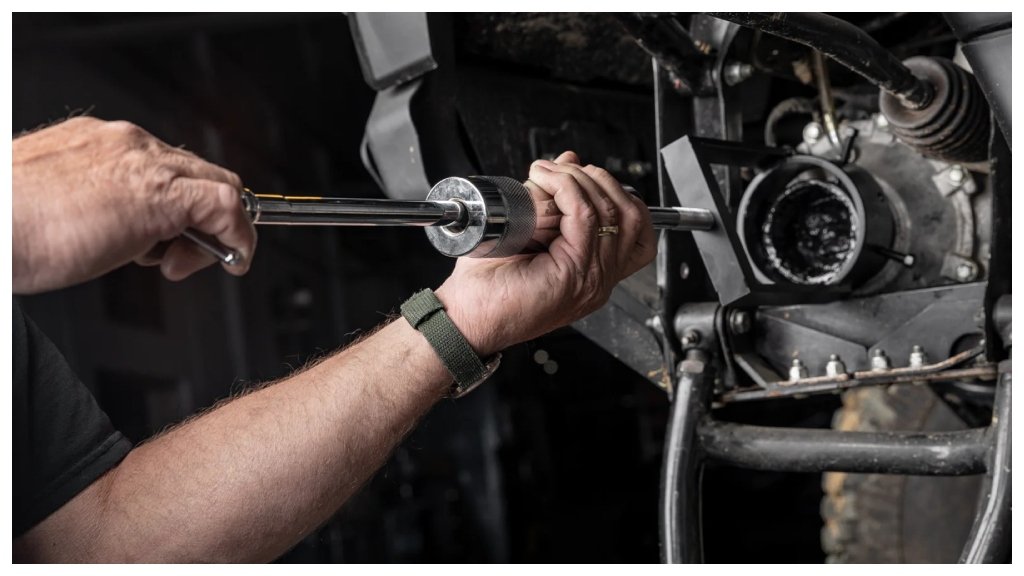
Step 5: Using the Axle Puller Tool
Here comes the tricky part: actually pulling the axle. This is where your axle puller tool comes in.
- Position the Axle Puller: Place the axle puller around the axle, ensuring that the tool’s jaws are securely gripping the axle. Some pullers have a specific design to accommodate the axle’s shape, so make sure you’re using the right one.
- Tighten the Puller: Use the screw mechanism on the axle puller to tighten it around the axle. As you tighten the tool, it will slowly begin to pull the axle out of its socket.
- Apply Even Force: Make sure to apply even pressure. If the axle is particularly stuck, it may require a little more force. You can tap the puller lightly with a hammer to help loosen it.
- Be Patient: It may take some time, but keep tightening the puller slowly until the axle comes free. Avoid using excessive force, as this can damage the axle or surrounding components.
Step 6: Remove the Axle from the Hub
Once the axle has been pulled out of the differential or transmission, you can focus on removing it from the wheel hub. Depending on the setup, there may be a bearing or hub assembly that holds the axle in place.
Use your bearing press kit to remove any bearings or seals that may be holding the axle in place. If the axle is stuck in the hub, you may need to apply some force using a hammer and punch to gently tap the axle out.
Step 7: Inspect the Axle and Components
After removing the axle, take a moment to inspect the part and the surrounding components. Look for any signs of damage, such as bent axles, worn bearings, or rusted parts. If any components are damaged, replace them before reassembling the vehicle.
Also, make sure that the new axle or parts you plan to install are the correct ones for your vehicle.
Step 8: Reassemble and Install the New Axle
If you’re replacing the axle, the installation process is essentially the reverse of removal. Here’s how to do it:
- Insert the New Axle: Carefully slide the new axle into the wheel hub and differential or transmission.
- Secure the Axle: Tighten any bolts that secure the axle in place. If there were bearings or seals, press them into place using the bearing press kit.
- Reinstall the Brake Components: Reinstall the brake rotor, caliper, and pads.
- Replace the Wheel: Attach the wheel back to the hub and tighten the lug nuts securely.
- Lower the Vehicle: Carefully lower the vehicle back onto the ground using the jack, and remove the jack stands.
Step 9: Test Drive and Check for Any Issues
Once everything is reassembled, it’s important to test the vehicle. Start the engine and take it for a short test drive. Pay attention to any unusual noises or vibrations that may indicate a problem with the axle or related components.
If everything sounds good, congratulations! You’ve successfully removed and replaced a stubborn axle.
Conclusion
Removing a stubborn axle may seem challenging, but with the right tools and a little patience, it’s a manageable DIY repair. By using an axle puller and other essential tools like a bearing press kit, you can remove and replace the axle with ease. Just remember to follow the steps carefully, take your time, and double-check your work before getting back on the road. Click here for more information.
Whether you’re a seasoned mechanic or a DIYer working on your first car repair, learning how to remove an axle will save you both time and money. Plus, it’s a rewarding skill that can help you tackle a variety of car maintenance tasks.